Finally, it was time to bring out the mean machine (in my case a Canon EOS 600D) and just like every other noob who picked-up a camera, I also started taking pictures, left, right and center without much thought to Camera settings, Composition, Exposure or any of the other technical jargon the professionals keep taking about all the time.
And Loved it…Someone once told me and I quote -
“Untrained Photographers sometimes have a great sense of Composition"
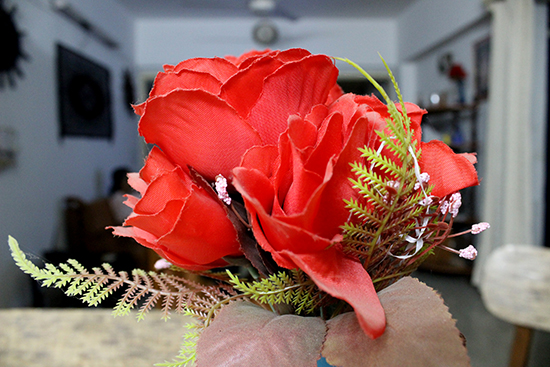
First thing I did was picked up one of Mom’s Flower Vases and clicked it from every angle imaginable. Most of them were useless, some were interesting but only one was a Keeper. I’m not gonna bore you and embarrass myself with the useless ones. So here’s a coupla interesting ones:
And here’s the Keeper:
Now, when I start clicking, I take a tonna pictures. At this stage I’m not really worrying about anything else, other than just capturing what I see, in as many interesting ways as I can. For every Keeper, I’ve got like 20 pics that never see the light of day. The ones that seem interesting are the ones that I keep in my computer and the ones that are Keepers are the ones that I actually take the trouble of processing in my choice of image editing software, the almighty Adobe Photoshop.
Well to be honest, every photo I click goes thru a Post-Process before I share it with the World. Here’s a small Before and After for my first Keeper (basic Color Correction): Click to View
Well to be honest, every photo I click goes thru a Post-Process before I share it with the World. Here’s a small Before and After for my first Keeper (basic Color Correction): Click to View
Since I’ve worked in the creative fields for quite a long time. I truly understand the importance of keeping track of all my assets and sorting them into appropriate folder structure. I NEVER delete images from the Camera. I always copy all of them and decide which ones to work with, on the computer. It’s just my opinion, but I like deciding which ones to delete by looking at them on a 21-inch computer screen rather than the 3-inch screen on the camera. I keep the original images in a folder called; you guessed it, ‘Originals’. Then I make another folder called 'Keepers' and sub-folder called 'Color' and copy the one that I wanna keep, here. I also make a 'B/W' and a 'Tint' folder, as these are the two post processes that I always experiment with.
Folder Structure:
Originals
Keepers – Color, BW, Tint
Keepers – Color, BW, Tint
Here's the Color, B/W and Tint for the Flower Vase: Click to View
After the Flower Vase I went for the Window Grill.
Here’s the Keeper: Click to View
Here’s the Keeper: Click to View
Before and After: Click to View
Color, B/W and Tint: Click to View
Then the Wind Chime on the Window caught my imagination. I went all around the hanging beauty and here’s the Keeper: Click to View
Before and After: Click to View
Color, B/W and Tint: Click to View
And the first day of adventures ended with photos of Trees growing outside the window, in these cases, the B/W versions turned out to be the Keepers: Click to View, Click to View, Click to View
Before and After:
In this case, besides the B/W Conversion, I also Cropped the image to better focus on the subject and removed the annoying black rod, right in the middle of the scene, using Cloning: Click to View
In this case, it's just plain B/W Conversion, although there's a tonna stuff you can do with each Color when converting: Click to View
Here I've again Cropped as well as Blurred the background, to focus more on the subject: Click to View
Cheers,
Yours Truly,


No comments:
Post a Comment